
Easter Swirl Pie Recipe Guide
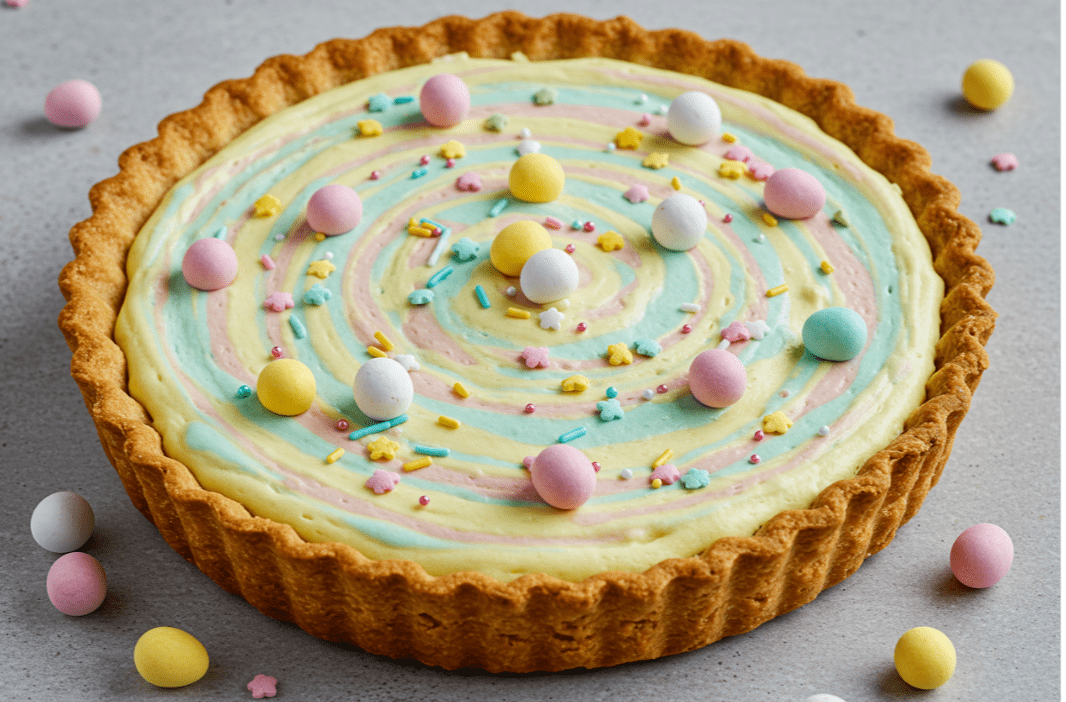
Spring has sprung, and that means it’s time for Easter desserts that are as colorful as they are delicious. If you’re on the hunt for a show-stopping treat that screams springtime cheer, look no further than the Easter Swirl Pie. It’s creamy, pastel, and full of fun—plus, it’s a no-bake dessert that won’t keep you chained to the kitchen. Talk about a win-win, right?
Why You’ll Love This Swirl Pie
You get all the wow factor of a layered cheesecake, the fluffiness of whipped cream, and the whimsy of swirling pastel colors—all with zero oven time. It’s creamy, colorful, and practically screams “Easter time!”
Ingredients Overview
Let’s break down what you’ll need to whip up this colorful delight.
Base Ingredients for the Crust
2 cups of graham cracker crumbs (or use your favorite cookie base—think vanilla wafers, golden Oreos, or even chocolate cookies for a twist)
½ cup melted butter
2 tablespoons sugar (optional)
Creamy Filling Essentials
16 oz cream cheese, softened
1 cup powdered sugar
1 teaspoon vanilla extract
2 cups whipped cream (homemade or store-bought)
Colorful Swirl Additions
Food coloring in soft pastel shades like pink, yellow, blue, and purple
A few small bowls for mixing
Toppings That Take It Over the Top
More whipped cream for topping
Sprinkles, mini chocolate eggs, or edible glitter
Equipment You’ll Need
Simple Tools for a Simple Pie
Mixing bowls
Electric mixer or hand whisk
9-inch pie dish
Spatula
Optional Gadgets That Help
Piping bags (for whipped cream)
Offset spatula for smoothing
Toothpicks for swirling
Step-by-Step Instructions
Step 1 – Making the Crust
Mix graham cracker crumbs with melted butter until it feels like wet sand. Press it evenly into a pie dish and pop it into the freezer while you prep the filling. Easy as… pie.
Step 2 – Preparing the Creamy Filling
In a large mixing bowl, beat the softened cream cheese until it’s smooth and creamy—no lumps allowed!, Add in powdered sugar and vanilla, then fold in the whipped cream gently. You want this mixture fluffy, not deflated!
Step 3 – Creating the Pastel Swirl
divide the filling evenly into four separate bowls. Add a few drops of a different pastel food color to each bowl and gently mix until you get those dreamy, spring-inspired hues. Think baby chick yellow, robin’s egg blue, petal pink, and lavender purple.
Step 4 – Assembling the Pie
Drop spoonfuls of each colored filling randomly over the crust. Swirl gently with a knife or toothpick. The trick is not to overdo it—you want a marble effect, not a color mash-up.
Step 5 – Chilling Time
Let the pie chill in the fridge for at least 4 hours, but overnight is even better. This gives it time to set beautifully.
Swirling Techniques for Picture-Perfect Results
How to Make the Perfect Swirl
Creating a mesmerizing swirl isn’t just a step in the recipe—it’s your pie’s artistic moment! Start by adding alternating spoonfuls of your pastel-colored creamy filling directly onto the crust. Try to alternate the colors around the pie so you don’t end up with big blobs of the same shade.
Now comes the magic part.
Grab a toothpick, wooden skewer, or the tip of a butter knife, and gently drag it through the colored sections. You can go in circular motions for a dreamy spiral look, or criss-cross in random swipes to mimic a marbled canvas. The trick? Be gentle and deliberate—let the colors dance together without fully merging.
Want a bolder swirl? Layer two rounds of color and repeat the dragging process. This technique adds more depth and flair with each pass.
Tips for Preventing Color Bleeding
We all love color, but no one wants a gray, muddy mess. Here’s how to keep your swirl crisp and clean:
Cool your filling: A room-temperature or slightly chilled filling keeps the colors in place better. If the mixture is too warm, it’ll melt into itself before you get the swirl right.
Use gel food coloring: Gel-based colors are more vibrant and require less product, meaning fewer liquids to potentially blur your lines.
Don’t overmix the colored bowls: Just a few folds to blend in the color are enough. Overmixing can cause the whipped cream to deflate and the texture to turn runny.
Chill quickly after swirling: Once your masterpiece is complete, pop the pie into the fridge immediately. This helps the filling set quickly, locking the swirl in place.
Decorating Your Easter Swirl Pie
Using Whipped Cream Creatively
Whipped cream isn’t just a topping—it’s your fluffy, edible frosting.
Try piping rosettes or dollops all around the edge of the pie for a polished bakery-style finish. Don’t have a piping bag? Use a ziplock bag with the corner snipped off for the same effect. Want to get extra fancy? Alternate colors or add a dusting of edible glitter for a magical touch.
You can also layer whipped cream across the top like a soft, snowy blanket and then nestle in your favorite pastel decorations.
Garnishes That Scream “Spring!”
This pie is your Easter table’s crown jewel, so don’t be afraid to go full spring celebration mode with your toppings:
Pastel sprinkles: Add them just before serving to keep their crunch.
Mini chocolate eggs: Nestled in whipped cream, they look like little hidden treasures.
Edible flowers: Think pansies, violas, or rose petals for a garden-fresh feel.
Bunny toppers or chicks: Perfect if you’re serving kids or hosting a themed brunch.
These final flourishes make your pie not just delicious, but Instagram-worthy.
Serving Suggestions
Best Time to Serve This Dessert
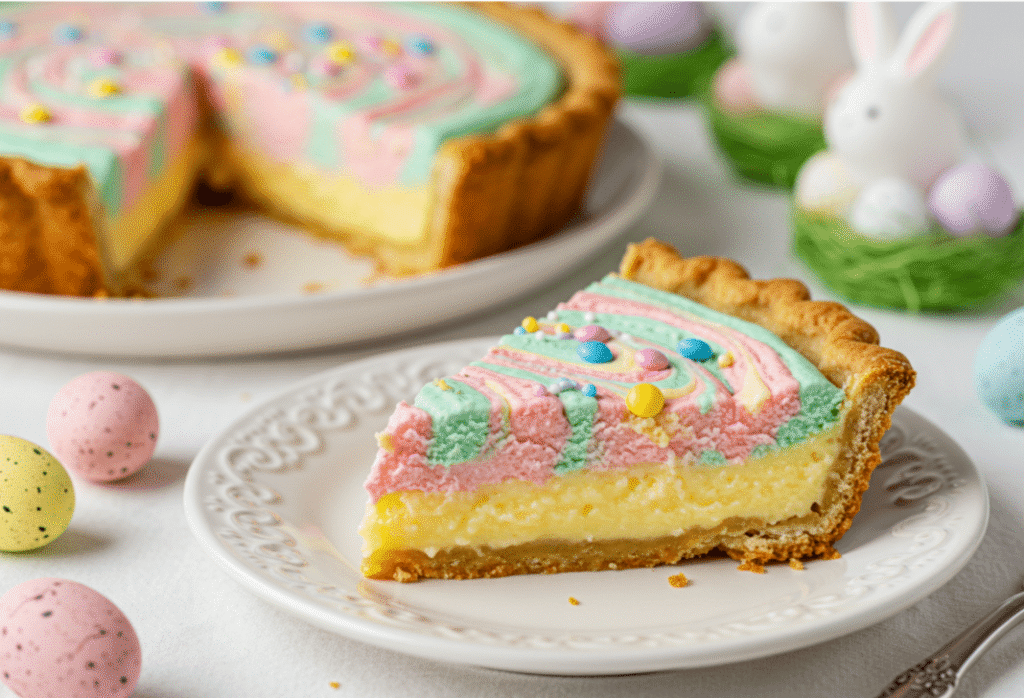
This pie is best served chilled and freshly sliced—and it fits in almost anywhere. It’s ideal after an Easter brunch, perfect as a light post-dinner dessert, or even a midday treat with a coffee or tea.
Its cool, creamy texture is a refreshing contrast to the heavier hot dishes often served during the holiday.
Pairing It with Other Easter Treats
This Easter swirl pie plays nicely with others! Here are a few mouthwatering pairings:
Carrot cake cupcakes: Their spiced base complements the light and fruity pie.
Fruit skewers: Bright and fresh, they make a healthy pairing and add a pop of color.
Lemon bars: If you’re planning a dessert buffet, lemony treats balance out the creamy texture of the pie.
Spring mocktails or tea: Floral teas like chamomile or lavender pair especially well.
Make-Ahead and Storage Tips
How Long Does It Last?
If you’re prepping in advance, great news: this pie holds up beautifully.
In the fridge: Keeps well for 3 to 4 days, tightly wrapped or sealed in a container.
In the freezer: You can freeze it for up to a month—wrap tightly in plastic wrap and foil. Let it thaw in the refrigerator overnight, and it’ll be ready to serve the next day—cool, creamy, and perfect!
Pro tip: Add garnishes like whipped cream or candy eggs after thawing so they stay picture-perfect.
Variations to Try
Mini Swirl Pies
Hosting a party? Turn your pie into adorable individual servings. Use muffin tins lined with cupcake wrappers or mini tart pans. They’re just as swirly and creamy—but even easier to serve.
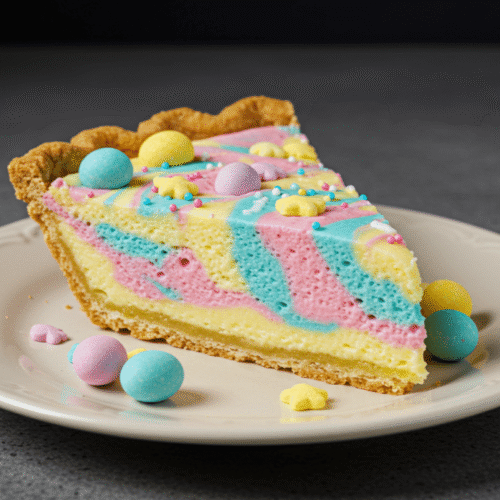
Chocolate Crust Twist
Want a richer base? Try crushed chocolate cookies or Oreos in place of graham crackers. It adds a bittersweet contrast that makes the pastel filling pop.
Vegan and Dairy-Free Alternatives
Easter can be inclusive too! Swap in:
Vegan cream cheese
Coconut whipped cream
Plant-based butter for the crust
The result? Just as creamy, swirly, and satisfying—without the dairy.
Healthier Swaps
Light Cream Cheese Options
You can reduce the richness by using low-fat or Neufchâtel cheese. Just keep an eye on consistency—it may be slightly softer.
Natural Food Coloring Ideas
Want to skip artificial dyes? These natural alternatives give great pastel hues:
Beet juice – pink
Turmeric – soft yellow
Matcha powder or spinach juice – green
Blueberry juice – blue or purple
A little goes a long way, and it gives your pie an earthy, wholesome vibe.
Common Mistakes to Avoid
Swirl Failures
The number one culprit? Over-swirling. You’re not painting a wall—just aim for a few light movements to marble the colors. Too much swirling will turn your beautiful pastels into a gray puddle.
Overmixing the Filling
Folding in whipped cream takes a gentle hand. If you beat the mixture too long or too hard, the airiness disappears, and your filling may not set properly.
Why This No-Bake Easter Dessert Is a Family Favorite
This pie doesn’t just look like a pastel dream—it tastes like one, too. The creamy texture, the whipped topping, the no-bake ease, and the fun swirl pattern make it a holiday must-have.
Even better? It’s a hands-on, memory-making activity for kids and adults alike. Whether it’s your first time making a swirl dessert or a new Easter tradition, this pie brings color and joy to the table every time.
Conclusion
Easter is all about joy, color, and sweet traditions, and this Easter swirl pie brings all three to the table—literally. With its light and creamy filling, dreamy pastel swirls, and whipped cream clouds, it’s more than just a dessert—it’s an edible celebration.
Whether you’re hosting a brunch, contributing to the family potluck, or just want something fun and festive to whip up with the kids, this no-bake Easter pie is your go-to treat. It’s easy to make, stunning to look at, and oh-so-delicious. So go ahead—dust off those mixing bowls, grab your favorite pastel colors, and swirl up some springtime magic!
FAQs
Q1: How far in advance can I make this Easter swirl pie?
You can make it 1 to 2 days ahead without a problem. Just be sure to keep it tightly wrapped and stored in the fridge to maintain freshness and texture.
Q2: Can I use gel food coloring instead of liquid?
Absolutely! In fact, gel food coloring is preferred. It’s more concentrated, delivers bolder pastel colors, and won’t thin out your filling like liquid dye can.
Q3: What if I don’t have store-bought whipped cream?
No worries! You can make your own in minutes—just beat cold heavy cream with a little sugar and vanilla extract until soft peaks form. You can also use dairy-free coconut whipped cream if needed.
Q4: Is there a gluten-free option for the crust?
Yes! Simply swap the traditional graham crackers for gluten-free graham crackers or gluten-free cookies. Everything else in the pie is naturally gluten-free.
Q5: Can kids help make this recipe?
Definitely! This recipe is a blast for kids. From mixing colors to swirling the filling and decorating with fun toppings, it’s a hands-on, creative activity that turns into dessert. Win-win!
Recipe Card :
Easter Swirl Pie Recipe Card
Ingredients
- For the Crust:
- 2 cups graham cracker crumbs or any cookie base you love
- ½ cup unsalted butter melted
- For the Filling:
- 16 oz 2 packages cream cheese, softened
- 1 cup powdered sugar
- 1 tsp vanilla extract
- 2 cups whipped cream or whipped topping
- Food coloring in pastel shades pink, yellow, blue, purple
- For the Topping:
- Extra whipped cream for decorating
- Pastel sprinkles mini chocolate eggs, or edible flowers (optional)
Instructions
- 👩🍳 Instructions
- Make the Crust: In a medium bowl, mix graham cracker crumbs with melted butter. Press the mixture into the bottom of a 9-inch pie pan. Chill while preparing the filling.
- Make the Filling : In a large mixing bowl, beat softened cream cheese until smooth. Add powdered sugar and vanilla extract, then mix until combined.
- Fold in Whipped Cream: Gently fold in the whipped cream until fully incorporated and creamy.
- Divide and Color: Divide the filling into 4 separate bowls. Tint each one with a few drops of different pastel food coloring (pink, yellow, blue, purple). Mix gently until evenly colored.
- Create the Swirl: Spoon dollops of each color filling randomly over the crust. Use a toothpick or skewer to gently swirl the colors together. Don’t overmix!
- Chill to Set: Place the pie in the fridge for at least 4 hours, or until fully set.
- Decorate and Serve :Before serving, top with whipped cream and your choice of festive garnishes. Slice, serve, and enjoy!
Notes
For best results, use gel food coloring for vibrant pastel swirls without thinning your filling. Make sure the filling is cool—not warm—before adding color to prevent bleeding. This dessert is perfect for making ahead, and it can even be frozen for up to a month. Just thaw overnight in the fridge before serving. Want to get creative? Try chocolate crusts, vegan swaps, or mini pie versions for parties or kids!